Apologies for lack of updates/my silence...
I have been so busy that wig making took a back seat. I recently organised a 2nd Wigs and Head Covers Event in London, which was very successful and have also been getting on with other things at home.
The good news is that I am nearly finished with making the wig foundation!
I am hoping to finish it tonight. After I have finished it, I will take some pictures to post on here and probably shoot some video to upload to You Tube. I am really proud of it. I tried the cap on again before I resumed sewing it down and spent some time pinning it to see if I could get a better fit. The end result of which was that I realised it did fit me okay and that I would only make it fit me worse if I started to fiddle with it and tuck areas. So for this first go at making a proper wig foundation, I think I have done very well - it looks neat. In fact it seems a lot better than I thought it would, so I am very pleased.
The next step is ventilation. I will, of course, be blogging about that too... so stay tuned.
Wednesday, 7 December 2011

Thursday, 20 October 2011
Finally... Pictures!
Since my last blog post, I have finally gotten around to taking some photos of the work in progress. Hopefully they will be helpful in illustrating what I have been, and am still, talking about and doing.
The update on making the wig foundation (wig cap) is as follows:
In the video I uploaded on YouTube, I was still working on getting the perimeter of lace and honeycomb tulle sewn down. I have now sewn the entire inside edge of the perimeter down, except for the extended nape.


This meant that I could, joy of joys(!), take the foundation off the block and... try it on! It also enabled me to remove the mould I had been using.
Trying it on - this was interesting! I was actually rather nervous about it - all this work so far seemed like a big time and energy investment, not to mention the financial aspect of purchasing all the supplies. Then there is that moment where you think: okay this could go either really wrong or really well. Funnily enough, my mind had not allowed for the middle option of: okay-ish. The result thus far (no hair on it, just the lace and tulle) is that it fits me okay. But - and this is a big 'but' for the perfectionist in me - is not quite as snug as I had hoped for at the front. I think for a first attempt it has been a good learning curve thus far and that it is a good outcome.
One thing I do know, is that undoubtedly I will have to use something at the ear tabs/sideburns area as it is too flappy. Those of you who have worn or tried on lace front wigs or glue-less lace wigs, will know exactly what I mean by that. This issue is compounded by the fact that the lace I have used is so fine and soft that it lacks any inherent structure. I shall have to look at how I can add more support and structure to that area. So far I have been thinking to add some wig springs (of the metal variety), but I am also looking into an alternative form of combs to the ones I have tried. I would not mind using combs if I could get them to grip my hair there. That is a big 'if', as up till now I have had no luck in that department due to a combination of a loss of density of my bio hair there and my hair being now very fine and slippery in texture. Ultimately, if I have to, then I will tape it down at that point, but of course I would rather not do this.
My next task is to sew the overlapping joins between the tulle and lace - I am already working on this. It means cutting the tulle down so that it fits just underneath the lace at the seam and then when I have done that, pulling the lace over the top and sewing the two down to create as smooth a line as possible on the top vertex.
One thing I have decided and learnt from the whole project - up to this point - is that I also want to try making a wig cap based PURELY on my measurements. That is to say, I will take a pattern of my front hairline, but aside from that I shall use the measurements to chart/mark out the pattern for the foundation on the wig block instead of using a mould. This is something that is instructed in all my wig making books, so at least I will have some plan to follow.
Another thing is that I may just go with the whole U-shaped vertex construction that you see on regular wigs - that is: a very fine (often a drawn through silk/French top) and then the sides and back (from crown to nape) being made with a more robust material (like the honeycomb tulle or stretch lace with wefts). I don't think I will do the drawn through option, but I might try doing honeycomb tulle everywhere except for the U-shaped vertex, which could be made from the fine lace. This might give the wig better stiffness at the sides, especially if combined with a metal spring.
I also - I know I am getting ahead of myself now, have it in my mind to try making a cap that does have a wefted back and sides, but sewn onto stretch lace in the manner of a sheitel (Jewish regular wig). Just to see how that works and turns out.
So many ideas and options... so little time and energy!
The update on making the wig foundation (wig cap) is as follows:
In the video I uploaded on YouTube, I was still working on getting the perimeter of lace and honeycomb tulle sewn down. I have now sewn the entire inside edge of the perimeter down, except for the extended nape.


This meant that I could, joy of joys(!), take the foundation off the block and... try it on! It also enabled me to remove the mould I had been using.
Trying it on - this was interesting! I was actually rather nervous about it - all this work so far seemed like a big time and energy investment, not to mention the financial aspect of purchasing all the supplies. Then there is that moment where you think: okay this could go either really wrong or really well. Funnily enough, my mind had not allowed for the middle option of: okay-ish. The result thus far (no hair on it, just the lace and tulle) is that it fits me okay. But - and this is a big 'but' for the perfectionist in me - is not quite as snug as I had hoped for at the front. I think for a first attempt it has been a good learning curve thus far and that it is a good outcome.
One thing I do know, is that undoubtedly I will have to use something at the ear tabs/sideburns area as it is too flappy. Those of you who have worn or tried on lace front wigs or glue-less lace wigs, will know exactly what I mean by that. This issue is compounded by the fact that the lace I have used is so fine and soft that it lacks any inherent structure. I shall have to look at how I can add more support and structure to that area. So far I have been thinking to add some wig springs (of the metal variety), but I am also looking into an alternative form of combs to the ones I have tried. I would not mind using combs if I could get them to grip my hair there. That is a big 'if', as up till now I have had no luck in that department due to a combination of a loss of density of my bio hair there and my hair being now very fine and slippery in texture. Ultimately, if I have to, then I will tape it down at that point, but of course I would rather not do this.
My next task is to sew the overlapping joins between the tulle and lace - I am already working on this. It means cutting the tulle down so that it fits just underneath the lace at the seam and then when I have done that, pulling the lace over the top and sewing the two down to create as smooth a line as possible on the top vertex.
One thing I have decided and learnt from the whole project - up to this point - is that I also want to try making a wig cap based PURELY on my measurements. That is to say, I will take a pattern of my front hairline, but aside from that I shall use the measurements to chart/mark out the pattern for the foundation on the wig block instead of using a mould. This is something that is instructed in all my wig making books, so at least I will have some plan to follow.
Another thing is that I may just go with the whole U-shaped vertex construction that you see on regular wigs - that is: a very fine (often a drawn through silk/French top) and then the sides and back (from crown to nape) being made with a more robust material (like the honeycomb tulle or stretch lace with wefts). I don't think I will do the drawn through option, but I might try doing honeycomb tulle everywhere except for the U-shaped vertex, which could be made from the fine lace. This might give the wig better stiffness at the sides, especially if combined with a metal spring.
I also - I know I am getting ahead of myself now, have it in my mind to try making a cap that does have a wefted back and sides, but sewn onto stretch lace in the manner of a sheitel (Jewish regular wig). Just to see how that works and turns out.
So many ideas and options... so little time and energy!
Thursday, 13 October 2011
Progress
After my last post, I have made some more progress with the foundation. I have just posted a new video on You Tube talking about my issues - the stress situation - and showing how far I have come with the sewing of the galloon and lace etc.
So to further document the next stage I have completed:
I laid the honeycomb tulle down. Funnily enough, and again surprisingly, it took me ages to do this. I do think that laying lace and tulle is going to be a real area where practice makes perfect. I am sure that with time and repeating the exercise, I shall get quicker. I suppose one also gets to know one's head shape, so once you have darted and tucked it one time, if you are using similar materials the next time, you will probably be making darts and tucks in roughly the same places *assuming the foundation fits well the first time around*. The other thing about this is that, again, I found that after quite a while of struggling I gave up and then came back the next day and "boom" I did it very quickly. Perhaps the brain is assimilating information while I sleep?!
Sewing the darts in the tulle has now been completed. I experimented with polyester cotton in a fairly matching colour for the nape darts (they are quite big/thick due to my head shape). I am not so sure how I feel about the look of this thead though; it looks quite obvious to me compared to the effect achieved with transparent thread. This is not such a bad thing because the nape ones will be covered by hanging down hair. However the two upper darts that are around the crown area, I have sewn down with the transparent thread as I definitely did not want that bulky or possibly visible look up there. The thing is, with the tulle, I was wondering if it is better to sew with polyester cotton as the tulle itself seems to be made from something like cotton. I was thinking: will the transparent thread rub against the tulle and wear it down? I don't know! We shall see; time will tell. If it does, I can probably mend it. I suppose that is the advantage of doing it yourself - you can fix most things reasonably well.
I know I have probably said this before, but I definitely will... take some pictures of the canvas wig block so that I can post a few WIP (work in progress) shots.
So to further document the next stage I have completed:
I laid the honeycomb tulle down. Funnily enough, and again surprisingly, it took me ages to do this. I do think that laying lace and tulle is going to be a real area where practice makes perfect. I am sure that with time and repeating the exercise, I shall get quicker. I suppose one also gets to know one's head shape, so once you have darted and tucked it one time, if you are using similar materials the next time, you will probably be making darts and tucks in roughly the same places *assuming the foundation fits well the first time around*. The other thing about this is that, again, I found that after quite a while of struggling I gave up and then came back the next day and "boom" I did it very quickly. Perhaps the brain is assimilating information while I sleep?!
Sewing the darts in the tulle has now been completed. I experimented with polyester cotton in a fairly matching colour for the nape darts (they are quite big/thick due to my head shape). I am not so sure how I feel about the look of this thead though; it looks quite obvious to me compared to the effect achieved with transparent thread. This is not such a bad thing because the nape ones will be covered by hanging down hair. However the two upper darts that are around the crown area, I have sewn down with the transparent thread as I definitely did not want that bulky or possibly visible look up there. The thing is, with the tulle, I was wondering if it is better to sew with polyester cotton as the tulle itself seems to be made from something like cotton. I was thinking: will the transparent thread rub against the tulle and wear it down? I don't know! We shall see; time will tell. If it does, I can probably mend it. I suppose that is the advantage of doing it yourself - you can fix most things reasonably well.
I know I have probably said this before, but I definitely will... take some pictures of the canvas wig block so that I can post a few WIP (work in progress) shots.
Friday, 7 October 2011
A Stressful Week - Decisions
This week has been a bit stressful for me in terms of wig making.
The good news is that I have made progress with sewing the galloon and that is all done now. I am really pleased that I did finish that within the time frame I had given myself. I am making a real effort now to set myself mini targets and to stick to them as I know if I don't do this, I will never get anywhere with the wig making. For anyone else who is reading this and is thinking about having a go or who is already trying to teach themselves wig making, I would suggest that you do the same. Long term and short term targets are really valuable tools in motivating yourself. My short term target right now is to get this foundation (wig cap/base) finished. My mini goal is to finish sewing my first piece of lace down.
After I finished with the galloon, I started laying down my first piece of lace, which covers the: ear to ear, vertex and front hair line area. It took me a long while to do that; much longer than I anticipated. I think this was partly because I have the kind of head shape that requires some darts. I found it more challenging to lay down this lace than the tulle when I made the prototype. The area is slightly different because when I made the prototype I was constructing a circumference band type wig cap, whereas because I wanted to lessen the amount and appearance of galloon going over my vertex area, I decided to make the real wig cap with only one piece of galloon on the vertex, in addition to the perimeter galloon, and this piece goes over the crown area.
The key to laying lace is to get the front hairline as smooth and flat as possible. You don't want any bumps, lumps, ridges or wrinkles. Instead of stretching the lace to make it taut, you need to smooth it with your fingers and then pin in place. I found myself smooth and pinning, then smoothing and re-pinning as pinning in a new area kept creating undesireable wrinkling in other areas. I took the lace off several times and re-started. I think the key at the novice stage is:
I thought I would have a couple of darts running from the galloon at the crown towards the front, however I ended up with one over each ear. When I made the tulle prototype, I believe I ended up with one over each ear and a couple on the top - so in a way, this may be better. The next step, which I have completed, was to sew the darts down. This helps to keep them smooth and flat.
After sewing the darts, I commenced sewing the lace onto the interior edge of the galloon. I have sewed two thirds of that and am just about to sew the last part (once I have finished writing this). I enjoy the sewing; it is quite therapeutic. I have been timing myself and I noticed I am definitely getting quicker the more I do it. I am hand sewing at the moment, but in the future I hope to try doing most or all of it on the sewing machine.
Once I have completed sewing the lace down, I can cut the excess off and start laying the next part down (the crown to nape).
Now onto the bad news...
I have had to make a decision over how to best ventilate the hair when I get to that stage. Several of my online friends and myself have wondered about the correct and optimum length of the returns (that is the piece of hair that is left and can stick out, sometimes called the mustache, when you make a knot with a hair strand). The wig making books that I have (I have 3), and that other people I know who are interested in wig making have, say one thing. Other people - on You Tube and at a wig making suppliers & a hair suppliers for example - were saying a variety of different things. I found this very confusing and completely overwhelming. Having so many different opinions stating this is how you should do it, makes it very difficult to judge which option or path to choose to go down. I started to feel like a cook who was in the middle of following a recipe and then had people saying: don't do that, it won't work out right, do this... The reality is that the length of the returns is important and a crucial part to get right of the whole wig or hair piece making process. Knowing that caused me to feel an intense amount of stress and pressure. No one wants to think they are going to expend all this effort and energy to get it wrong.
I have come to the conclusion that when you choose to attempt to make wigs, that canvas wig block, foundation and hair become your baby. To complete the task, a certain amount of dedication and enthusiasm is required and because most people who attempt to do it have great passion about what they are doing and want to achieve, it is hard not get really emotional about the whole process. For me, the learning curve continues. My lesson of the week has been to realise that I will make mistakes and to be prepared to pick myself up, dust myself down and try again.
The good news is that I have made progress with sewing the galloon and that is all done now. I am really pleased that I did finish that within the time frame I had given myself. I am making a real effort now to set myself mini targets and to stick to them as I know if I don't do this, I will never get anywhere with the wig making. For anyone else who is reading this and is thinking about having a go or who is already trying to teach themselves wig making, I would suggest that you do the same. Long term and short term targets are really valuable tools in motivating yourself. My short term target right now is to get this foundation (wig cap/base) finished. My mini goal is to finish sewing my first piece of lace down.
After I finished with the galloon, I started laying down my first piece of lace, which covers the: ear to ear, vertex and front hair line area. It took me a long while to do that; much longer than I anticipated. I think this was partly because I have the kind of head shape that requires some darts. I found it more challenging to lay down this lace than the tulle when I made the prototype. The area is slightly different because when I made the prototype I was constructing a circumference band type wig cap, whereas because I wanted to lessen the amount and appearance of galloon going over my vertex area, I decided to make the real wig cap with only one piece of galloon on the vertex, in addition to the perimeter galloon, and this piece goes over the crown area.
The key to laying lace is to get the front hairline as smooth and flat as possible. You don't want any bumps, lumps, ridges or wrinkles. Instead of stretching the lace to make it taut, you need to smooth it with your fingers and then pin in place. I found myself smooth and pinning, then smoothing and re-pinning as pinning in a new area kept creating undesireable wrinkling in other areas. I took the lace off several times and re-started. I think the key at the novice stage is:
- To have patience
- To not be afraid to re-start
- To take frequent breaks
- To come back again later if you can't do it and try again
I thought I would have a couple of darts running from the galloon at the crown towards the front, however I ended up with one over each ear. When I made the tulle prototype, I believe I ended up with one over each ear and a couple on the top - so in a way, this may be better. The next step, which I have completed, was to sew the darts down. This helps to keep them smooth and flat.
After sewing the darts, I commenced sewing the lace onto the interior edge of the galloon. I have sewed two thirds of that and am just about to sew the last part (once I have finished writing this). I enjoy the sewing; it is quite therapeutic. I have been timing myself and I noticed I am definitely getting quicker the more I do it. I am hand sewing at the moment, but in the future I hope to try doing most or all of it on the sewing machine.
Once I have completed sewing the lace down, I can cut the excess off and start laying the next part down (the crown to nape).
Now onto the bad news...
I have had to make a decision over how to best ventilate the hair when I get to that stage. Several of my online friends and myself have wondered about the correct and optimum length of the returns (that is the piece of hair that is left and can stick out, sometimes called the mustache, when you make a knot with a hair strand). The wig making books that I have (I have 3), and that other people I know who are interested in wig making have, say one thing. Other people - on You Tube and at a wig making suppliers & a hair suppliers for example - were saying a variety of different things. I found this very confusing and completely overwhelming. Having so many different opinions stating this is how you should do it, makes it very difficult to judge which option or path to choose to go down. I started to feel like a cook who was in the middle of following a recipe and then had people saying: don't do that, it won't work out right, do this... The reality is that the length of the returns is important and a crucial part to get right of the whole wig or hair piece making process. Knowing that caused me to feel an intense amount of stress and pressure. No one wants to think they are going to expend all this effort and energy to get it wrong.
I have come to the conclusion that when you choose to attempt to make wigs, that canvas wig block, foundation and hair become your baby. To complete the task, a certain amount of dedication and enthusiasm is required and because most people who attempt to do it have great passion about what they are doing and want to achieve, it is hard not get really emotional about the whole process. For me, the learning curve continues. My lesson of the week has been to realise that I will make mistakes and to be prepared to pick myself up, dust myself down and try again.
Saturday, 1 October 2011
Wig Springs
One thing I forgot to mention in my last post, but which probably deserves a mini-post of its own is the wig springs!
Earlier in the year, I was talking about them and a person reading this blog asked me to provide further information, which I did. However, as I had not used them, I couldn't really comment on them in-depth, beyond the information I had read/been provided with by suppliers.
Now I have actually used them in a wig, I can give a bit more commentary. Here are the basic facts:
1. The plastic ones I have come in 3 sizes. The size relates to the length.
2. They are made from a very slightly bendy, white-ish plastic.
3. They need to be covered with galloon before you can use them.
Extra information relating to points 1-3:
I tried all 3 sizes at various points/positions on the wig I was converting (from full lace to more of a regular style that does not require bonding). The largest, which are the longest, work very well in the back of the wig. I used two of these - each one stretching on the diagonal from the two 'corners' of the nape towards the occipital bone. Using the other two sizes was less successful. You have to cover the plastic with galloon in the same colour as your cap (or your flesh); a. so they are not noticeable and b. so that you can sew them to the wig cap as the plastic would not hold otherwise (there is no obvious way of sewing simply the plastic on) and it might rub your skin. Because you have to cover them, this increases the bulk and I found that at the front, if I positioned them nearer the front edge/front hairline area, in a way which in theory would be better for a closer fit, they pushed the sides of the wig out and you would be able to see them (or be conscious that they might be seen).
In addition, these plastic springs are not as bendy as I had hoped for. I knew they wouldn't be "bendable in half", but I did think they would be more malleable than they are. The bendability - is that even a word? - of them is minimal. When I compare them to the springs I can feel in mass manufactured wigs I have worn in the past, they are definitely less bendy, and as such, I find that they are not as useful when trying to mould the wig so that it lies closer to the skull.
The reason I was trying to use these plastic wig springs as opposed to the metal ones, is because they are safer from a rusting point of view. However, I am now beginning to think I shall try the metal ones too - I will get hold of some and try them on my next wig - as I have a feeling they might, just might, be a lower profile. I also think they may be a bit more bendy and flexible, which is what I really need. Of course, to address the possibility of them rusting, I shall have to buy some protective material, which again needs to be tightly bound around the spring.
I will have to report back my findings in the future.
Earlier in the year, I was talking about them and a person reading this blog asked me to provide further information, which I did. However, as I had not used them, I couldn't really comment on them in-depth, beyond the information I had read/been provided with by suppliers.
Now I have actually used them in a wig, I can give a bit more commentary. Here are the basic facts:
1. The plastic ones I have come in 3 sizes. The size relates to the length.
2. They are made from a very slightly bendy, white-ish plastic.
3. They need to be covered with galloon before you can use them.
Extra information relating to points 1-3:
I tried all 3 sizes at various points/positions on the wig I was converting (from full lace to more of a regular style that does not require bonding). The largest, which are the longest, work very well in the back of the wig. I used two of these - each one stretching on the diagonal from the two 'corners' of the nape towards the occipital bone. Using the other two sizes was less successful. You have to cover the plastic with galloon in the same colour as your cap (or your flesh); a. so they are not noticeable and b. so that you can sew them to the wig cap as the plastic would not hold otherwise (there is no obvious way of sewing simply the plastic on) and it might rub your skin. Because you have to cover them, this increases the bulk and I found that at the front, if I positioned them nearer the front edge/front hairline area, in a way which in theory would be better for a closer fit, they pushed the sides of the wig out and you would be able to see them (or be conscious that they might be seen).
In addition, these plastic springs are not as bendy as I had hoped for. I knew they wouldn't be "bendable in half", but I did think they would be more malleable than they are. The bendability - is that even a word? - of them is minimal. When I compare them to the springs I can feel in mass manufactured wigs I have worn in the past, they are definitely less bendy, and as such, I find that they are not as useful when trying to mould the wig so that it lies closer to the skull.
The reason I was trying to use these plastic wig springs as opposed to the metal ones, is because they are safer from a rusting point of view. However, I am now beginning to think I shall try the metal ones too - I will get hold of some and try them on my next wig - as I have a feeling they might, just might, be a lower profile. I also think they may be a bit more bendy and flexible, which is what I really need. Of course, to address the possibility of them rusting, I shall have to buy some protective material, which again needs to be tightly bound around the spring.
I will have to report back my findings in the future.
Wednesday, 28 September 2011
Back After The Summer Break
Hi everyone!
I wasn't anticipating taking a summer break, but such is life - things got very busy for me and I just didn't have the time to devote to updating my You Tube channel or this blog. The good news is that I am now back and raring to go. I have already made a start by uploading a You Tube video and I am in the process of uploading another. I have been having a few problems with You Tube and Windows Live Movie Maker, so we shall see if it works or not. *Fingers crossed*
Over the summer I finished off a couple of wig making projects:
I wasn't anticipating taking a summer break, but such is life - things got very busy for me and I just didn't have the time to devote to updating my You Tube channel or this blog. The good news is that I am now back and raring to go. I have already made a start by uploading a You Tube video and I am in the process of uploading another. I have been having a few problems with You Tube and Windows Live Movie Maker, so we shall see if it works or not. *Fingers crossed*
Over the summer I finished off a couple of wig making projects:
- Converting a full lace wig into a regular style wig
- My first wig repair
Converting the full lace wig into a "regular-style" wig - this was a project I started back in the early summer, in a bid to make some use of a wig that I actually never wear. The wig was wrongly sized for me and just would not work when I tried to bond it. When you add to this the fact I am not crazy on bonding anymore, you end up with a wig that sits in the closet. The sad fact of the matter was that: a. I had spent a lot of money on that wig and b. the hair quality was lovely. So I thought that it was about time I tried to make it functional for me.
To cut a long story short, the way I chose to embrace this task was to edge the entire wig with monofilament galloon. This gave the wig a little more rigidity and structure. As the wig was on the large side in some areas and flapping, I decided to add a piece of elastic to the nape, along with a couple of long wig springs. This means that the nape holds down really well. I also added a zig-zag wire wig comb to the nape (but I need to remove this or alter its position as it rubs my occipital bone). I also added a few snap combs which I experimented with using by clipping them to my stocking wig cap - I am not convinced about this! It does work, but getting them and the stocking wig cap in exactly the right place is tough...
So when I went to get this baby cut, it ended up being stuck down at the front... ugh, yes I know, I know... I said no bonding! But needs must - I had an appointment! I didn't actually bond the entire front, I instead bonded the very top front from not even temple to temple, but corner to corner of my horizontal hairline (going across the top of my face) with one large piece of Supertape on the roll. Then I used some bobby pins and wedged those into the sides and a couple over my ears - instead of gripping my hair (which doesn't work) they gripped my stocking wig cap. The back needed no bonding or bobby pins - now that was a result! I basically have something that is just beyond a lace front!
If I get myself into gear, I shall show some pictures of the inside of the cap. I have pictures of the wig before and some of it after it was cut into a new style.
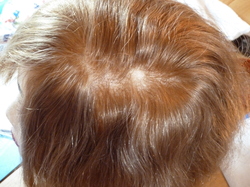
My first wig repair - A friend of mine, who has alopecia and has to wear wigs full time, asked me to repair a wig for her. It's a really nice wig, has a bit of wear and tear to the cap, but totally serviceable, except for the fact that it was: balding. Now I always think that a wig that is balding is a big insult! As if it's not bad enough to be bald or balding, your wig is balding too!
I should establish a couple of facts here: 1. my friend was aware of my novice wig repairing/making status and 2. I made no promises that I would do a good job.
I set about turning this balding situation around.


There were a few things I found out about repairing -
- The wig cap - mesh, lace, net, mono (whatever it is) should be examined prior to mending. I started mending, only to discover there were very tiny (I mean tiny) little disruptions - you can read: holes - to the lace/mononet. This meant that if one tried to ventilate there, they risked making the situation worse. I kept away from those areas and tried to ventilate so the hair would fall over them and thus, conceal them. They were literally 1 edge of a lace/net hole, but often there seemed to be several of them in the same area - as if the lace were failing slightly.
- Knots - always, always check the knots of the hair already ventilated onto the wig or hair piece before agreeing to repair it. I agreed to do it and started work before I realised that the hair on the rest of the wig was basically going to fall out pretty pronto, due to a total failure of most of the knots! I did speak to my friend about this - turns out there has been virtually no knot sealing and the use of ball-tipped pin-head brushes on the wig. I agreed to continue with the task, but in the future I would not attempt to repair anything with knots like that. It is a case of not being worthwhile for the client/friend or for the ventilator.
- It takes a long time - if you are ventilating into completely bald or almost completely bald areas, no problem, as the area is essentially clear and free of hair just like a fresh piece of lace would be. If the person whose wig you are repairing wants you to add hair throughout areas where there is already hair, but it is a bit sparse, then be prepared to spend some time doing it. This is because working in that type of area is hard. You have to continually pin the hair back so that you can see the holes and not get your needle/hook tangled up in the hair that is already there. I did use a water spray as well.
The outcome of repairing = the wig looks great, but would I do it again? Probably not! It took me far longer than expected. I was pleased with the result, but I also felt that it was one of those cases where sometimes it is perhaps better to start from scratch and make something new.
Update: my own wig making - So my own wig making has taken a back seat whilst I got on with the repair and family life. I am getting back into it this week and shall be updating again with my progress and hopefully some pictures. The second video has finally uploaded, so here's where I am at now:
Tuesday, 5 July 2011
Got My Materials... and Converting Full Lace Wigs
Hi everyone!
Sorry for the delay in writing this. I have been so busy with life and wig making. First off, I have just uploaded a short video to You Tube, in which I show you the materials I received from the wig making company. To summarise:

Sorry for the delay in writing this. I have been so busy with life and wig making. First off, I have just uploaded a short video to You Tube, in which I show you the materials I received from the wig making company. To summarise:
- Monofilament Galloon in 1 cm and 0.7 cm widths
- Light Blonde Galloon in 1 cm and 0.5 cm widths
- Honeycomb Lace in Light Blonde
- Fine Lace (like very fine Swiss lace) - comes in flesh tone
- Stretch Lace (has honeycomb type holes - slightly different to some stretch I have seen) - also comes in flesh tone
- Transparent Thread
I also ended up separately buying a really large reel of blonde colour polyester thread as the one I have is just a regular cotton reel and I know I will probably run out of it at some inopportune moment. I also picked up a big pack of pins too as I find I am using a lot of these and sometimes they break or bend etc.
Here's the video:
I mention in the video that I have been converting a full lace wig into a non-bonded one. The reason for this is two-fold. Firstly, due to medical problems, the wig no longer fits me correctly for bonding. It means that bonding it is very difficult (more-so than normal) as the wig does not want to lay correctly to be adhered down and secondly, because of those medical problems I find bonding to be difficult because I do not really have the energy to keep my arms in the air for long periods of time on a regular basis. So, there I was with a 16 inch remy wig just lying in my closet waiting for something to happen. I actually really need a wig right now that works for me, as the hair I do have is very short and while I don't mind that, there are times when a girl just wants to have long hair.

So far I have probably spent about half a day working on the wig. I am half-way though. I would say that the effect with this wig is almost like a glueless lace wig, except that the front is no longer lace straight to skin, instead it is monofilament galloon. I shall be ventilating a little more hair into the top middle, as I am parting the hair in the middle - a rarity for me! Parting the hair in the middle helps to make the density less noticeably "pouffy" on top (something that I am trying to get away from as I find it is unflattering on me). I shall also under-ventilate hair into the inside of the galloon as this will help to cover any edge. Once this is finished, I shall be getting it cut into a style and will put up a pic at some point of the finished product.
Anyway, before I started converting the full lace wig, I had finished the prototype cap and tried it on. It fitted me extremely well except for the nape. I think the nape didn't work so well because on my original head mould, I had not managed to cover the bottom inch or two of the back of my head to my nape, so when I put the pattern on the block, I ended up guessing how far my nape extended and so on. Taking this into account, I made a new mould of my head, put it on my block and stuffed it so that I could start making a proper wig cap to make my first wig with. I was mapping out the galloon structure (by default this step essentially creates a pattern for you to follow) and had started sewing the joins, corner darts and the gathers over the ears. Once I have finished the lace wig - by the end of this week - I shall be going back to doing that. I hope to take some pictures so to illustrate what I am talking about.
Subscribe to:
Posts (Atom)