I thought it would be a good idea to talk about the importance of having a good working position or ventilating position. I touched very briefly on this issue a while ago in this blog, but I have done enough of my own work now to be able to comment more in depth on it.
Obviously wig making is a time consuming activity to engage in and because of the nature of
the beast you can find yourself sat for incredibly long periods looking at something in very minute detail. This type of work can have quite a negative impact on your body if you are not careful and mindful. There are several things to think about:
1. The position you sit in
2. Your eyes
3. Breaks
The position you sit in to work - I have tried quite a number of positions now, ranging from the obvious one of sitting at a surface such as a table, workbench or desk through to the less obvious of sitting in a squishy armchair with lots cushions and a beanbag to rest my legs on! I also have ventilated in bed, on my bed, sitting on a couch and probably some others I cannot even remember.
One thing I have noticed is that it depends on what type of work I am doing as to which position is more suitable and comfortable. For me, hand sewing tends to work quite well with the block on a clamp at a table/desk/bench or with the block in my lap while I am sitting on the couch or in an armchair with my feet on the ground.
When ventilating, I need to be able to change the position and height of the block more easily and it varies quite markedly as to what angle/height I need the wig block to be at, depending on which area I am working on. For example, if I am working on the right side of the foundation, I like to swivel the block so that this side is primary to me rather than twisting myself to reach it/look at it. In addition, ventilating for long stretches is definitely more comfortable, for me personally, if I am sitting in a comfy seat rather than at a table/desk/bench. So I have been finding it more comfortable to sit with my legs supported by something so I can have them higher up (not on the ground), either resting on a large beanbag or a footstool. That way I can have them bent or crossed and prop the wig block up on them. I have also been using a cushion on my legs and then putting the block on that (the cushion is like the scatter type you use on a couch and is feather, so it moulds to the block shape if I press down on it a little bit and stops it from rolling side to side or away from me).
Side note -
I know I am not the only person who ventilates in a position where their legs are raised (if they are not using a clamp or stand). I once watched a video of a theatrical wig maker who worked by sitting on a high stool with her legs propped up on a high level work surface/bench! The block was placed in her lap. She spent hours ventilating like that - so I guess what works for you really does depends on your body and any physical issues you need to overcome/compensate for (e.g. if you already have a back or neck problem to bear in mind).
If I want to ventilate on my bed, I usually sit cross legged and then rest the block on my legs, again using a cushion to raise the height of the block. I put lots of pillows behind me to support my back and shoulders. You can get a wig cradle to put your wig block in, as this helps to stabilise the block when working with it in a horizontal position. It functions regardless of whether you are working at a table or with the cradle resting on your lap. It looks like this:
Available from Banbury Postiche.
If you are working at a desk/table/bench you may want to get an adjustable chair that allows you to adjust the angle of the backrest and seat, as well as the height of the seat to an appropriate level. Office chairs are good for this purpose. If you don't have one or can't afford one and find you are sitting too low, then use some cushions or seat pads to raise the height of your chair seat. If your work surface (and thus the wig) is too low, then raise the level of the block by using an adjustable clamp or put something large (phone directories, old shoe boxes filled with books) under the block/cradle to raise the height of the block so that it is nearer your eyes/hands.
To sum up...
- Vary the position you sit in as this can help prevent muscle ache
- Use props, if necessary, to support your body - e.g. cushions under arms or against your back or under your bottom (!) to raise you to the right height when working at a hard surface or a footstool or beanbag to support your feet/legs
- Ensure your block is at the correct angle so as to prevent neck strain/pain and shoulder tension
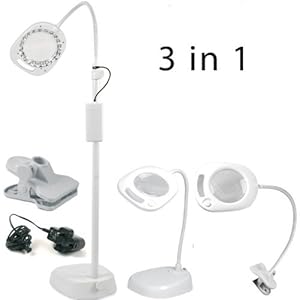
Your Eyes - Lighting is important because it can make so much difference to how well you are seeing the area you are working on. I have even thought I was seeing quite well until I turned extra lighting on and then realised that I was actually straining a little bit to see clearly. This is especially a factor if working during the winter or in the evening/at night. You can get specialist daylight lamps and magnifyer lamps that are free standing on a table top, clamp to a surface or are free standing on the floor. If you can't afford one, using a desk lamp to spotlight the area you are working on can be helpful. I sometimes use one like this:

Glasses are another factor - I do think it is worth getting your eyes checked if you have not recently had an eye exam and mentioning the close work you are doing or will be doing. I wear glasses for mild short sightedness and astigmatism. I have noticed that when I am doing any close work (not just wig making, but crafting etc.), if I look up after focusing on an item close-up, I cannot focus properly for distance vision. If I wear my glasses, I don't have this problem, so to avoid eye strain and complete blurriness when I look up, I have been wearing them for wig making.
Use a contrasting backgroung colour to help your eyes see the difference between hair and lace/foundation material. Bright blue paper or blue painters tape helps to create contrast between the lace and hair. This can be very important if you are using less 'visible' hair. For example, I am currently using dark hair against a pale/translucent lace, which is fine if the lighting is good as the dark against light is fairly obvious. However, when doing repair work for someone else, I was working with blonde hair on a translucent lace. The base colour of my block is a kind of of taupey grey and is not very useful for helping anything (dark or light) to show up. In this instance (when working with lighter hair) I would
definitely use some kind of brighter colour behind it - the blue works well and is favoured by wig makers. You can cover the block (or styrofoam head if you are using one of those) with it fairly easily or, if you are in a pinch and have some bright blue paper, you can use that by pinning a small section of it to the block or head under the area you are working on. I have used both and they work equally well visually. Although in the long term, the tape works better as you can cover the whole area you will be working on. If you use the paper, it's not practical to cover the whole area as you will find you have pins holding the paper down which get in the way of your work and could potentially snag your foundation.
To sum up...
- Ensure adequate, bright lighting is illuminating the area you are working on
-
Create constrast between the hair and lace if necessary
- Wear glasses, if needed, and/or use a magnifyer to prevent eye strain
- Make sure to keep your work close enough that you can see it well - use a cushion, wig cradle, clamp or stand to get the block at the correct distance
Breaks - it is easy to get sucked into the
wig making vortex and end up ventilating for hours with no break. It is a good idea to change positions every so often - get up and walk around for a few minutes, have a drink, look at something in the distance (good for your eyes to focus on far away if you have been focusing on close-up work for a while - according to my optician)... stretch! Give your hands a wiggle - they can get a bit stiff (in my case) and sore from holding the hair under a certain amount of pressure and from holding the needle holder. If you struggle to remember to take a break, set a timer to go off periodically.
Wig making should be fun! As it takes quite a long time to make a wig from scratch (especially if you are a beginner and learning how to make the foundation and to get into a ventilating rhythm), it is worthwhile taking a little time to figure out a good position so that you can enjoy many happy, flexible and pain-free hours of wig making!