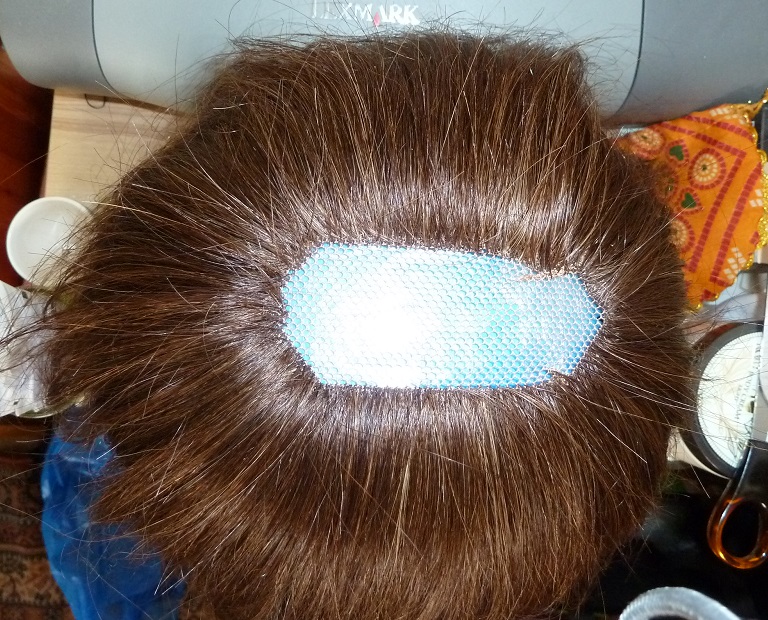
Thursday, 1 August 2013

Making Hairpieces - Special Challenges

One of the things I have discovered over the years that I have been working at wig making is: there's always something new to learn! Perhaps surprisingly, given their size, hairpieces are a nice little challenge and there is a lot more to designing and making them than meets the eye. Due to the way in which a hairpiece is worn, I find there is a certain complexity to the design and planning stage and this goes beyond what I would normally need to think about when designing and planning a wig.

How much hair?

With a wig, I can generally guesstimate how much hair I will need; however, with a hairpiece this is more complicated as one has to think:

How big is the hairpiece?
How dense does the hairpiece need to be?
Will the hairpiece be totally hand tied?
Is the hairpiece going to be really short or really long or somewhere in the middle?

Length and density can dramatically affect the amount of hair needed, and hand tying has implications over a hairpiece that incorporates a mixture or weft and ventilation.

Big versus Small Base?

Another aspect to think about when they are planning a hairpiece is:

How big does the base really need to be?

When I was working with people who had hair loss, I noticed that there was a tendency for people to want to get the biggest hairpiece possible, but this does not always work out for the best:
  • The wearer was over-compensating for their loss and needed less hair. Too much hair looks fake.
  • As with wigs, a lot of hairpieces are made with excess hair which means they are far denser than a normal/average head of hair would be. In reality this means that the bigger the base, the more excess hair there is - this is hair which we would not normally have on our heads and suddenly there it is... and you know what? It looks fake too. This is, unfortunately, especially true when you put such a hairpiece on the head of someone suffering from partial hair loss/alopecia. The thick density of the hairpiece does not blend well with the natural density of their own hair: the two do not merge. Sometimes people with hair loss have to adapt to the fact that the hair they have left has changed, and rather than trying to achieve what they used to have, it is better and more realistic to work with what they have - thus someone who used to have thick hair may find that when replacing what is lost, to effectively blend it with what they have means they end up with a medium density. For those wearers who do not like this idea, a wig can sometimes be better as there are less or no issues of blending with their own hair.
A solution may be one of the following:
  1. A smaller base - If the person wants to compensate for one or two layers of hair, a small hairpiece can work wonders. Sometimes less is more! In this situation, hairpiece base length tends to be more important than width. The hairpiece needs to cover the front to crown to provide a sheet/wall of hair falling down over the person's own hair, whereas width just adds more hair so 2 inches for minimal loss or someone wishing to cover their roots would work well.
  2. Rethinking the large base - Sometimes it is better to stick with a large base rather than ventilating the same amount of hair as you intended to 'replace' into a smaller base, as this can result in a dense/thick hairpiece and a poor blend between the wearer's hair and the hairpiece. Instead you would ventilate less hair into a larger area of base material; this results in the hair being spread over a greater area, thus looking more natural rather than having a lot of hair ventilated into a small area and looking like a great clump/chunk of hair plopped on top of someone's head. If you do decide to ventilate less hair into a larger base, it is worth thinking about the part line (if there is one) and ensuring that it will be dense enough. 

Wednesday, 10 July 2013

Men's Toupee Hair System - making, cutting & styling

Recently I had to make a hair system (toupee) that was to be in a 1960s pompadour style. Effectively it should look like the top of this but without the gel:

From: http://www.elvis.com/news/detail.aspx?id=6399

The Base - I used durable wig net and a lace perimeter that enables bonding and a natural hairline. This is the first time I have used wig net is for this type of work. The pros are that it is cheap, it is a reasonable colour if working with brown hair and it is very durable. The cons are that the holes are very large and because the hair on the top of the head is more likely to separate than hair hanging down, you can rely less on heavily dense large knots to hide the holes than if this material was being used at the back or sides of a wig. As a result I had to do so many more knots, which was time consuming.


The Hair - I used Indian hair in a number 4 with some blonde to to create a variation of colour/highlight. This type of hair is softer and more malleable than say Chinese, and the natural movement/kink/wave of the hair helps when creating the hairstyle. The hair was a lot longer than I needed for this style, but it didn't matter as I was going to cut it anyway. It is worth thinking about the style you wish to achieve when selecting hair, as your end result can be heavily influenced by this aspect. Some hair types do not lend themselves well to certain styles.


Cutting & Styling - I cut the hair into a pompadour style, then combed it back and ran some wax through the dry hair. I then styled it by combing the under layers back towards the crown, and then combing the front upper layers in a diagonal fashion towards one side, and using my hand to 'bump' the front to give it that pompadour look. I fixed the style with hairspray.


Overall I am pleased with how this turned out.

Wednesday, 19 June 2013

Away From The Keyboard

I haven't posted for a while because I have been so busy! I am currently working on 3 projects and will post pictures when I get a chance. I have been ventilating until 2 a.m. some nights, although to be fair, I don't start until late morning.


Sunday, 9 June 2013

Fully Hand Tied Wig Pictures - A Transformation

I have been meaning to post this for a while, but things have been really busy and I never seem to get around to it. I am rectifying this today!

Brushed out before washing & deep conditioning:


After washing, deep conditioning, cutting & styling:


I wanted to keep the long length for now, but it needed a good tidy up of the layers and length. I did a massive wash/condition routine on this wig. It needed some serious intervention! It has been shampooed, conditioned, deep conditioned and had 3 leave-in products on it. The hair is really soft now and has a beautiful wave. 


I am really pleased with this wig: it stays on with no bonding, it is a good density for me (not too full on top) and has a similar configuration in terms of part line and vertex/crown density to how my own hair was before any hair loss. 

The construction: 

Extended Nape: Super Fine Lace
Crown to Occipital: Honeycomb Lace
Crown to Front and Sides: Super Fine Lace
Edges: Whole Perimeter Monofilament Galloon

I am working on a lot of other projects at the moment, so will update on those at some point. 


Sunday, 26 May 2013

Choosing Hair Colour When Wig Making & Colour Blending

Over the years that I have been undertaking the wig making research process, I noticed that there is an aspect of wig making that tends to get somewhat overlooked: hair colour. So much of a wig maker's focus tends to be on the construction of the wig foundation or the hairpiece base, that what type and colour hair to use is sometimes almost an afterthought. In reality, it should be given equal thought.

Unless one is making a wig for a character as part of a production (TV, film, theatre etc), then there seems to be two situations regarding hair colour:
  1. People who want to stick to, or as near as possible to, their own hair colour (or, in the case of alopecia totalis/universalis and people who dye their hair, what they think would be their own hair colour).
  2. People who want to use supplemental hair as an opportunity to change their hair colour.
In situation 2, choosing hair depends on what the wearer envisages, as the change could be minimal (1 shade lighter), but you may also find that some people do not mind having far more expressive, modern and funky hair colours. For people who are open to suggestions, it can be a case of: anything goes and I think as a wig maker, it can be a good way to exert some creativity.

At the same time, it is sometimes hard to imagine how a wig or hairpiece is going to look, so asking the prospective wearer for pictures (from magazines or printed off the Internet) that demonstrate the colour they are trying to achieve can be a good way to aid the design process. It also helps to minimize getting your wires crossed about what they really want, and you think they want. Do not be afraid to make well-thought suggestions if you think the colour or colour combination may not be the best option for them. If you choose this be careful how you word it; usually it is better to gently suggest an alternative.

It is also important to be aware that not all colour tones suit all skin undertones. For example, I am a person who struggles to wear blonde. It's definitely not an easy colour for me to wear because most shades of it can make me look sickly, pale and/or yellow. I tend to suit daker hair colours, certain reds, and highlights that are light brown rather than blonde.

For people in situation 1, while adhering to requests for a match to their own hair, it is important to try and achieve as natural a hair colour as possible. For example, people who have European-type hair tend to have hair that has a range of hair strands of different tones that make up their 'one colour', rather than every hair strand being the same colour. As a wig maker trying to achieve this look, this is where colour blending can be a good option. If the request is for colour 8, blending a 6 and a 10 together can achieve a nice shade that is somewhere in the middle and has a depth and richness that may not be achieved by using just one colour.

The wefts below are virgin European human hair in a number 6 (the darker on the right) and a number 10 (the lighter on the left):

Hand Wefted Virgin European Human Hair in Number 6 and Number 10
Close Up of Hand Wefted Virgin European Human Hair in Number 6 and Number 10

Combine these two colours - 1 weft sewn on top of the other, and you get this blended hair colour:

2 wefts blended to make a mid-range hair colour
Close up of the blended hair colour
On the other hand, people of other ethnicities, such as Asian and African, who are opting for colour 1, 1b and 2 will generally be okay with having a 1 shade colour. This is because it is rarer to find a high level of variation in individual strand colour in these shades.

Saturday, 18 May 2013

Quick Wig Making Tip: Taking Old Wigs and Hair Pieces Apart

People are often really surprised by the amount of random things I know about wigs and hair pieces; sometimes I even surprise myself! It's taken me a long time and quite a lot of work to amass this knowledge. Much of it has come because I have spent so much time wearing supplemental hair, and when you wear it, you want to perfect it, so the search for the best and the most realistic cosmetic hair solution starts and never seems to end. Sometimes people ask me how they can go about learning all the little bits and bobs of knowledge that some of us wig makers and wearers take forgranted. Here's a quick tip...

If you are seeking to learn more, one of the best ways you can build up a good level of knowledge is by taking apart old wigs and hair pieces. In my opinion, as a wig maker it is really important to understand how wigs and hair pieces work - i.e. what makes them look a certain way, what makes cetain construction methods (types of wigs and hair pieces) work or not for different needs/uses/situations and so on. By taking apart ones that have already been made, not only do you learn how they are constructed, but you can also keep some of the 'spare parts' for later use when experimenting or making your own. For example, wig springs, combs, clips and even adjustable straps can be re-used when learning.

Stitch Unpicker
A Stitch Unpicker - This can be really useful when taking apart
old wigs and hair pieces.
http://lvfashionworld.wikispaces.com/file/view/unpicker.jpg/243649693/unpicker.jpg
You might be wondering how to get your hands on some wigs and hair pieces for the purpose of taking them apart. If you have friends who wear them, then ask them for their old ones they might throw away so that you can experiment. If you don't have any old ones and no kind friends to donate them, then try buying some old 'beaters' (well used full lace and lace front wigs that would overwise be hitting the bin/trash can) or second hand wigs and hair pieces on ebay. You can sometimes find old wigs for sale on Remember, don't pay too much! 

A good way to get the most out of this learning experience is to use a camera to document the process. Take pictures of the inside of the foundation (cap)/base and then as you remove sections or unpick parts, take pictures of that too. It can also be helpful to make notes and drawings to refer back to later. It's easy to quickly forget what you are seeing/learning. I like to create a wig making notebook and folder in which to keep all my notes, pictures and other resources that I have amassed. It also is quite a boost to eventually look back at how much you have learnt.


Sunday, 12 May 2013

Important Considerations When Making A Wig - Darts

Darts are an inevitability for a wig maker. If you don't know what a dart is, then here's an explanation:

http://en.wikipedia.org/wiki/Dart_(sewing)

The reason they are found in hand-made wigs and larger hairpieces is because both a wig and a large hairpiece (that encompasses the curves of the head) are not a flat shape. When flat fabric needs to make a rounded skull shape, some form of dart is involved. Another reason you may run into them along your wig making journey is when making alterations to a wig.

As I have mentioned before on this blog, I recommend gaining some sewing skills before you set about hand-making wig foundations and large hairpiece bases. Both of these tasks require not only sewing skills such as knowledge of various sewing stitches, haberdashery and perhaps how to use a sewing machine, but also an innate understanding of how to use fabric to design and make something you are evisaging in your head.

There are a few rules that should be followed when making wig foundations and hairpiece bases that incorporate darts:
  1. Unless the person you are making for has an uneven head shape (for some reason), aim to make the darts 'even'. That means: if you have a dart over one ear, you should have one over the other ear. In reality this usually means making the first dart smaller, and then making another dart the other side, taking up the rest of the slack you have realeased off the first dart you made (so basically halving the dart you had initially made). 
  2. Darts on the side should be turned towards the back.
  3. Darts on the crown and back should be turned towards the centre.
  4. With wigs, if pinned correctely darts should not be placed on the vertex. 
Here is a primative drawing (!) I did - excuse the egg-head:

The red triangles are the 'darts', the blue line on the side view is the wig edge. The red line denotes the middle of the wig; it is helpful to mentally divide the wig down the middle so that you ensure you have an equal dart on the opposite side. You can see why you would want the darts to be even, as it helps to create a symmetary to the wig shape and ensure it fits properly without being bulky. 

Example of darts placement on a wig - note that each one is mirrored by an equal on the opposite side

Notes:

Re: #1 - When laying the lace/tulle/net/monofilament, or whatever fabric it is you are using to make the foundation/base, you will intially pin various points of the material and start to make darts as you lay and stretch the fabric to make the rounded scalp shape. As you then move further back, or around to the other side of the block/head, you will find that you need to unpin some points that you have already pinned in order to make the cap smooth and shaped correctly. In the case of darts, I try to pin both sides at the same time because I know I need to create an equal dart on the other side. I.e. if I am pinning a dart on the right side, I will start adjusting the left side in the same place/location, using temporary pins half-pushed-in (rather than completely pushed in/fixed) to hold sections, so that I create two equal darts on both sides, instead of one large one on one side. How many darts you end up using depends on the person's head shape that you are making the wig for, and how many pieces of material you are using to make the wig. Some wigs are made using only 1 type of material as the base. Others have several sections to their pattern and use a different piece of material for each section. Regardless, the same principle applies throughout.

Re: #2 and #3 - When you make a dart, you literally pull a section of fabric up in your hand and then fold it over, as it is essentially 'excess' material. You would then pin it, to hold the excess fabric in place while you pin the rest of the wig material onto the block. There are different types of darts used in dress making and other types of sewing, but usually in wig making, darts are triangular in shape because of the cap shape we are creating.

Here is an example of how a dart is created:


The blue arrow indicates the fabric being pulled over so that the two yellow lines meet (the yellow line edge of the fabric on the right side lays on top of the yellow line edge of the fabric on the left side). After pinning the whole wig, you would then sew along the pinned edge of each dart - along the yellow line, so that the fabric is joined together permanently and, most importantly, lies flat. I sew mine along both edges to make sure they are totally smooth and low-profile.

It is also imporant to follow a basic rule when marking darts on a wig:

Darts on the left - fold towards the right
Darts on the right - fold towards the left

Or... another way of looking at it = if you are making a dart on the side, you are folding towards the rear of the head/wig and if you are making a dart on the back, you are folding towards the opposite ear.

Re: #4 - As a general rule of thumb, it is less desireable to create darts on the vertex (the vertex being the top of the head from front harline to crown and from side to side before the head curves away). The reason for this is because you want the area everyone looks at (the top and front) to look seamless, and smooth... as if the person is not wearing a wig. Sometimes we have to make darts in this area due to the fabric being used and/or the shape of a person's head. In this case, it is very important to think about their placement. You want to think about the hairstyle that the wig will end up being styled in. E.g. if the wig is going to have a partline, don't make a dart that shows in this area. If the hair is going to be brushed back for some reason (ponytail or up-do or short hairdo) and/or you are creating a wig with a very fine, graduated hairline, putting a dart somewhere at the front will be more likely to show. Usually one would aim to have no darts on the front hairline, and if you need to put darts in the front section of the wig, then place them over the ears, or along a line around the crown (but avoiding any partline or open crown areas).

Example of a wig dart


Purple lines highlight the two darts -
one is deep over the ear, but misses the vertex and the other
is on the side pointing towards the crown, but again is hidden.